Multi-Point Standard Isotope Calibration
lyticOS handles multi-point isotopic calibration in a powerful and intuitive way.
Typically a calibration line (y=mx+c) is generated, which maps measured isotopic results to expected isotopic results. Once a calibration line is available, we can then use the same calibration line for samples and produce calibrated results.
Injections that are known standards can be grouped together into Calibration Groups. This means that a calibration line is calculated from all the injections within the group. This concept can be extended to take into account drift correction from one Calibration Group to another.
Within a batch, select the Calibration button to display the Calibration wizard (you can optionally display the wizard or the advanced calibration settings dialog).
The Auto Correction wizard will be displayed.
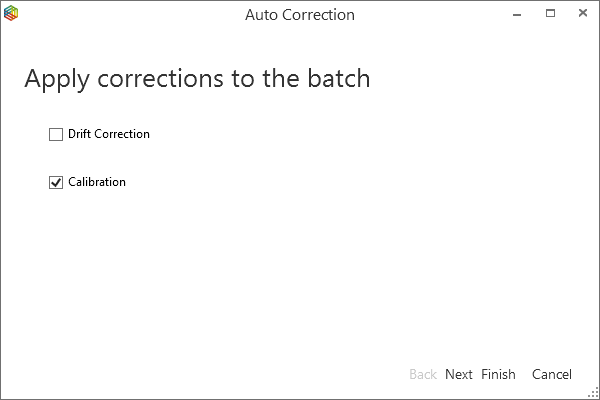
Select the type of correction that you want to apply to your data.
Selecting particular corrections will result in those corrections being overwritten, but will not affect other corrections that you may have already applied.
Click Next to display specific settings associated with the correction types that you want to apply.
To remove all corrections, open up the Advanced calibration settings (Ribbon Tab -> Calibration & Corrections (drop-down) -> Advanced) and click the Clear all corrections linl.
Calibration
If the Calibration correction option is selected, then the Calibration settings page will be shown.
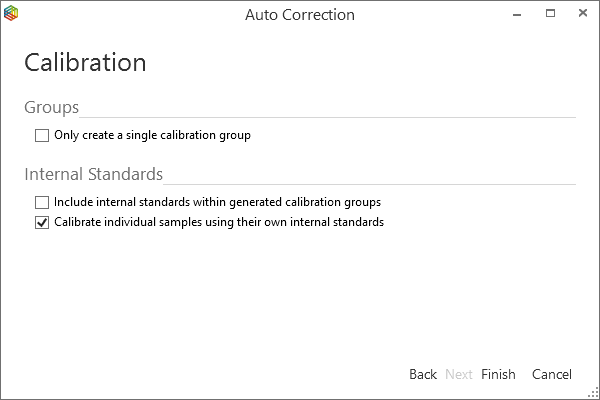
Figure 9-68: Corrections Wizard - Calibration Settings
The calibration algorithm automatically groups standard injections into standard groups. Standard injections that are separated by sample injections are put into separate standard groups. By default, sample injections will be calibrated against the most recent (in terms of time) calibration group.
You can optionally force the wizard to put all standard injections into a single calibration group by selecting the "Only create a single calibration group" option. With this option selected, the same standard groups are created (as if this option is not selected), but with the addition of another standard group containing all the standards. All samples are then calibrated against this resulting calibration group containing all standards.
By default, the "Calibrate individual samples using their own internal standards" option is checked. This means that any samples that are defined to have internal standards within them, will only be calibrated against their own internal standards (and not any other standards within the batch).
The "Include internal standards within generated calibration groups" options provides a mechanism to allow other samples to be calibrated against samples with internal standards. In this case, the internal standards are also included as part of calibration groups that samples can be calibrated against.
The default behavior of the Calibration wizard has been designed to support many common calibration scenarios, but it is not suited to all. In this case, the Advanced corrections dialog can be used.
Advanced Corrections
If the default behavior of the Calibration wizard does not meet your requirements, then you may be able to tailor the calibration using the Advanced settings to your specific calibration needs.
From within the Advanced correction dialog, you can start the Auto Corrections wizard. The wizard can often provide a good starting point for advanced calculations.
Groups
The process of applying corrections to individual injections is made simpler by the concept of Groups.
Within the Groups tab, you can group injections into standard groups.
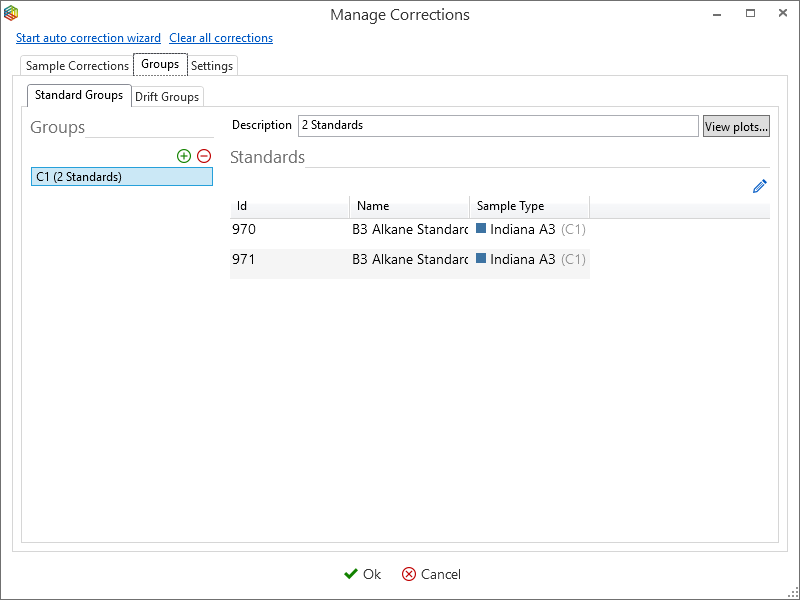
Figure 9-69: Advanced Corrections - Stadnard Groups
A standard injection can exist in one or more standard group. You can quickly view the calibration plot and equation of any standard group by clicking the View Plots button.
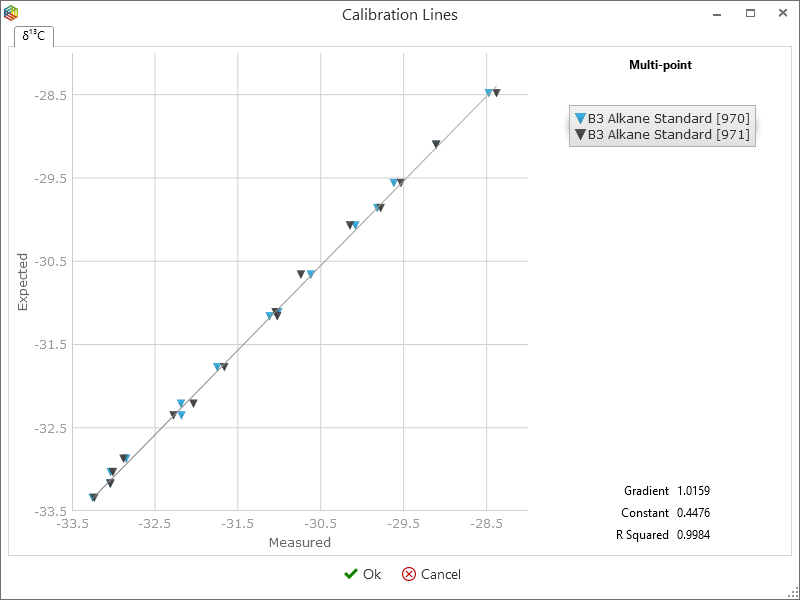
Figure 9-70: Example Calibration Plot
You can add or remove calibration groups by clicking the Add or Remove button. You can edit the standards within a any standard group by selecting the Edit button. You will then be presented with a list of all the standards within the current batch. Simply tick the standards that you want to include as part of the standard group.
It is also possible to define "Drift Groups".
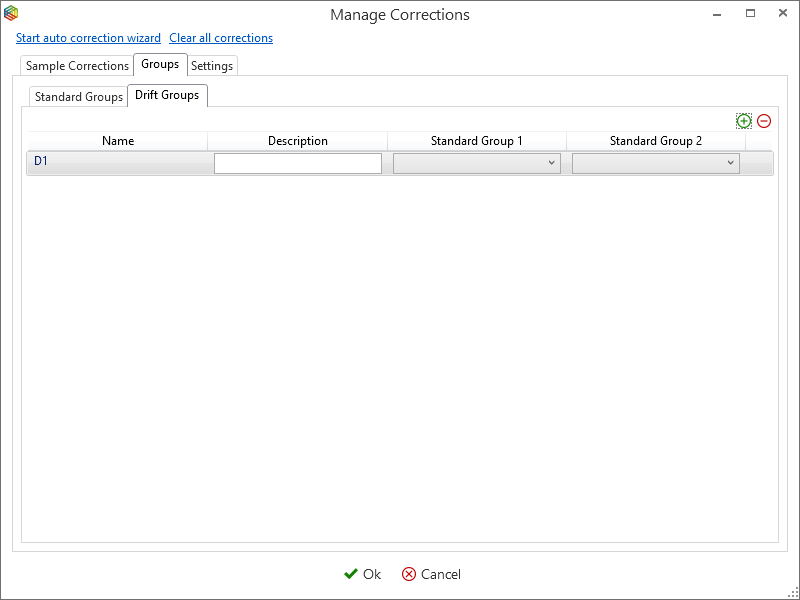
Figure 9-71: Drift Groups
A Drift group provides a mechanism for drift correcting between 2 standard groups, so to use this feature, you must have at least 2 standard groups defined.
The resulting drift correction is applied linearly between calibration groups based on the sample index between the groups. Note: the actual injection time is not used as part of the drift correction calibration.
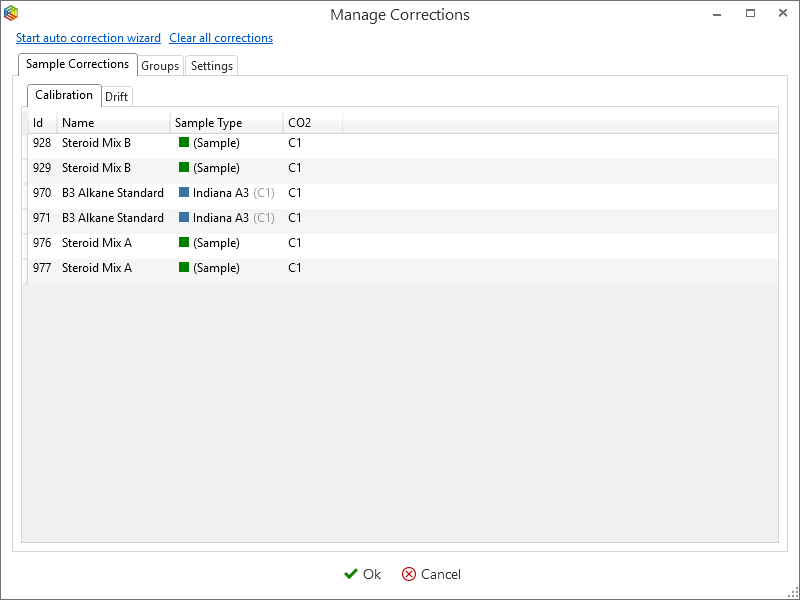
Applying Corrections
The Advanced corrections window allows you to apply individual corrections to individual injections straightforwardly.
Assuming that you have already defined standard groups, ensure that the Sample Corrections tab is selected.
You can then choose the tab of the type of correction that you want to apply (E.g. Calibration, Drift, etc.).
You will then be able specify which Group you want to use to apply the correction to each individual injection and species.
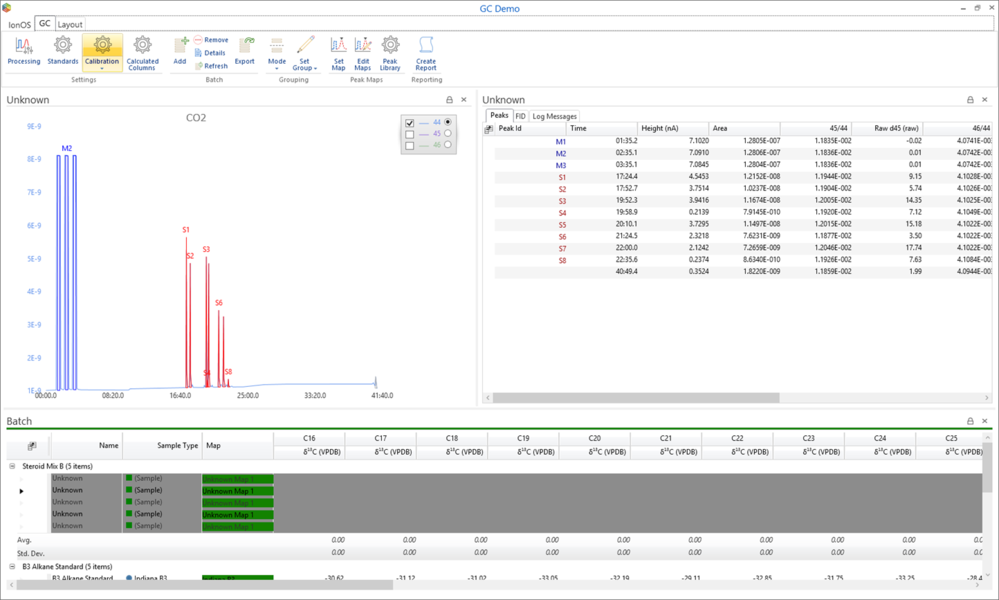
Results
Calibration results are displayed within the batch grid.
Calibration groups are automatically named in ascending order C1, C2, etc.
The sample type column is used to display which calibration group a standard injection is in.
A calibration group name is displayed next to all calibrated results, to signify which calibration group was used to calibrate the result. If drift correction has been applied, then this is replaced by D1, D2, etc. to signify which drift group has been used.
Within the Settings tab of the Advanced corrections window, you can choose if you want to see calibration group summary information within the batch grid (e.g. C1, C2, D1, etc.).