IonOS Setup
IonOS Distribution
IonOS is typically distributed on a USB memory stick. The USB memory stick will contain:
When distributed along with any instrumentation, the USB memory stick will also contain:
- Instrument configuration file
- Build and configuration data
Installing IonOS
Before attempting to install IonOS, please see the list of IonOS Installation Requirements (System Computer Configuration).
You can download the latest IonOS setup files from the Downloads Page within the support portal. Once downloaded you can then start the installer.

Figure 5-3: IonOS Installer
You may be presented with a User Account Control dialog. Verify the publisher and press Yes to continue with the installation.
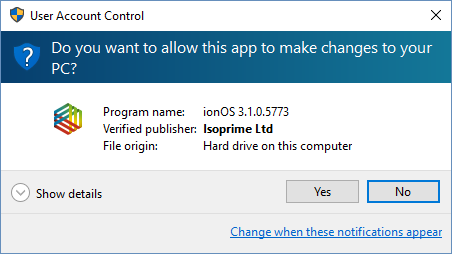
Figure 5-4: IonOS Installer - Windows User Account Control
You may be prompted to install several other software packages that IonOS depends on (SQL Server).

Figure 5-5: IonOS Installer Progress Reporting
Wait for the installation to complete.
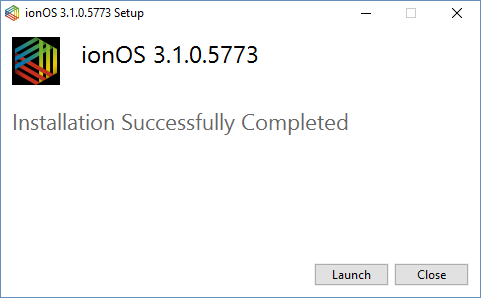
Figure 5-6: IonOS Installer Complete - Launch Button
Once installed, either click Launch to close the installer and start IonOS or click Close to close the installer without starting IonOS.
Troubleshooting
Common problems when installing IonOS can usually be solved by verifying the following:
- Verify that you are not trying to install IonOS onto a Windows XP PC.
- Verify that you are using the correct installer for the processor type (in Windows, navigate to Control Panel -> All Control Panel Items -> System and check the operating system type)
- 32-bit (x86)
- 64 bit (x64)
- Verify that the installation requirements have been met
First Time Start-up
The first time IonOS starts it will automatically install and configure a database, which may take some time (progress displayed in splash screen). IonOS will then display a set of dialogs designed to get IonOS up and running as quickly as possible.
First Time License Installation
IonOS will display an Install License wizard asking for you to select the license file to be installed. Without a license file IonOS functionality will be severely restricted.
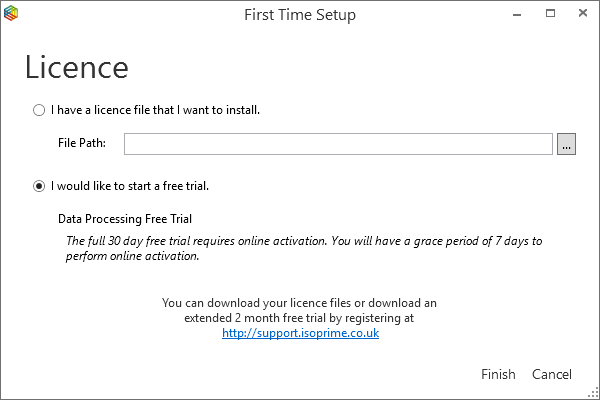
Figure 5-7: IonOS First Time Setup - License
You will be able to download license files directly from within the My IonOS section of this website. If you have not yet purchased a license file, you may download a free trial license from the My IonOS section of this website. Alternatively, you may wish to purchase a license by contacting a distributor.
Once you have downloaded a license file you can then set the File Path within the Install License wizard and click Finish and select the I have a license file that I want to install option. Click Finish.
To fully enable the newly installed license file, you will have to accept its Software License Agreement (SLA).
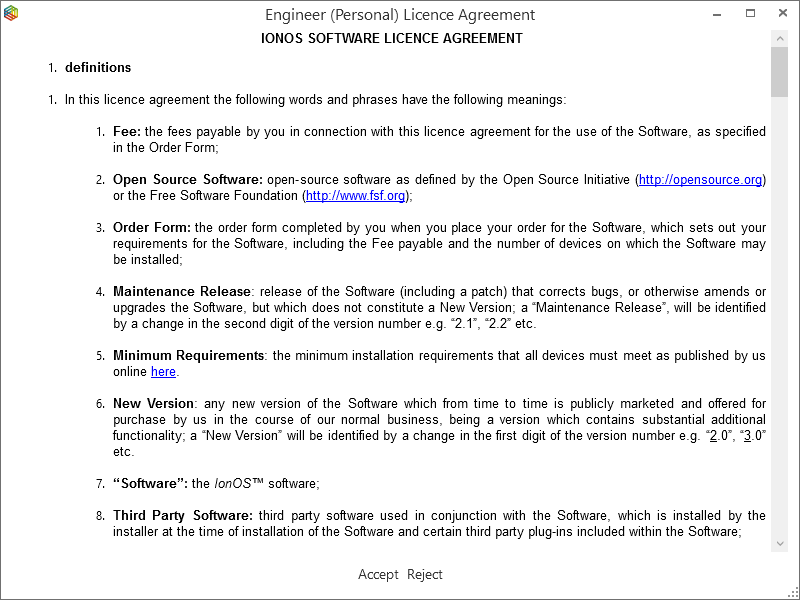
Figure 5-8: IonOS Software License Aggreement
Once the SLA has been accepted, IonOS will attempt automatic activation of the license online. See License Activation for more details.
First Time System Configuration
If your installed IonOS license(s) support the control of instruments (E.g. not a standalone data processing license), then IonOS will display a dialog asking for the location of a *.isys file (System Configuration File).
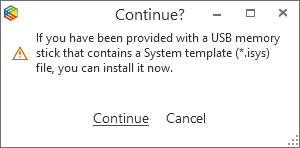
The *.isys file is usually contained in the accompanying USB memory stick that IonOS was distributed on.
Click Continue and browse to the *.isys file and click OK.
The *.isys file contains all the instrument specific parameters unique to the instrument(s) that you have been supplied with. For example, the *.isys file contains all the relevant species, tunings and method parameters for your isoprime precisION system.
System configurations can be managed by clicking IonOS Home -> Systems -> Configure.
Installing Example Data
IonOS will automatically import some example data into IonOS and display a dialog reporting its progress. This example data can easily be removed if required.
IonOS Home Screen
When you start IonOS (and first time setup is complete), you will be presented with the IonOS Home screen.
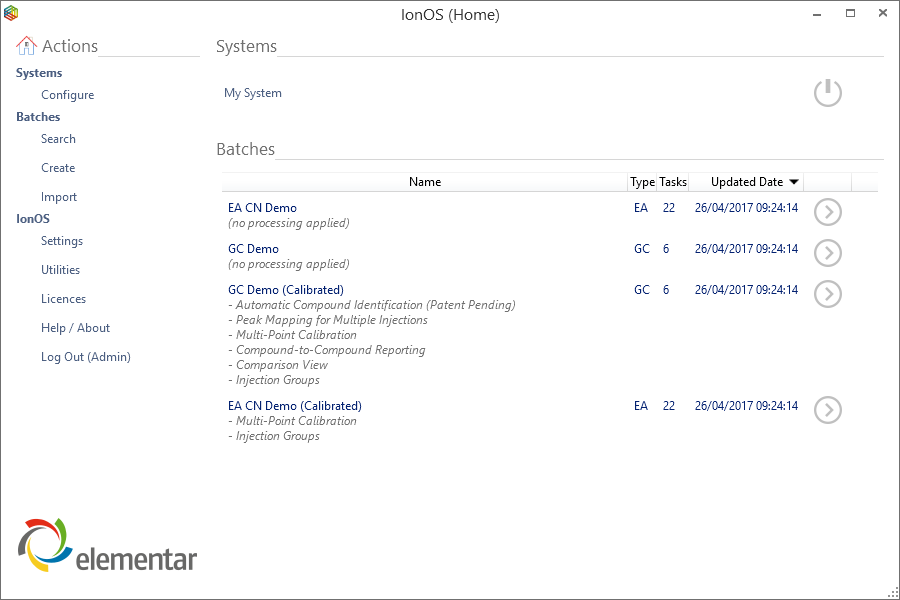
Figure 5-10: IonOS Home Screen
License Files
To use IonOS a valid license file (*.lic) must be installed and activated. Multiple license files can be installed at the same time. The resulting enabled functionality is then a composite of all installed license files.
Installing License Files
Click IonOS Home -> IonOS -> Licenses.
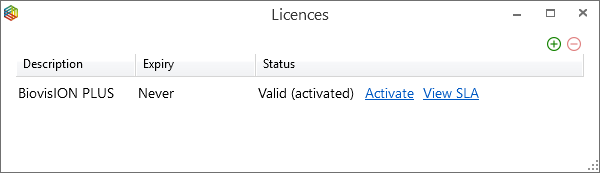
Figure 5-11: IonOS Manage Licenses Dialog
Click the Add button to add a new license file.
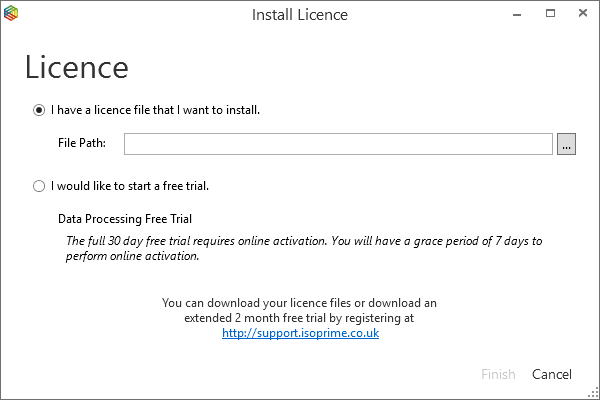
Figure 5-12: IonOS Install License Dialog
Browse to the *.lic file and click OK. Activation will then be performed. See License Activation for more details.
Managing License Files
Click IonOS Home -> IonOS -> Licenses.
Figure 5-13: IonOS Manage Licenses Dialog
To uninstall a license file, select it and click the Remove button.
If a license has not been activated, an Activate button will be visible allowing activation to be attempted.
Each installed license file has its own Software License Agreement (SLA) associated with it, which must be accepted to enable the license. Click the View SLA button to view the SLA for a particular installed license file.
License Activation
Once installed, automatic activation of the license will be attempted, which requires an internet connection.
Any license has a built-in tolerance for how long it can be used before activation is required. This is usually set to 5 days. In most cases, license activation will be a seamless automatic process. If a license has not been activated, an Activate button will be visible allowing activation to be attempted. Automatic or Manual activation will always require an internet connection or access to Elementar’s internal servers.
Activation requires a description of the computer to be entered. This allows for easy management of license files and activations via My IonOS. For example, you will be able to see the computer descriptions of where your licenses have been activated.
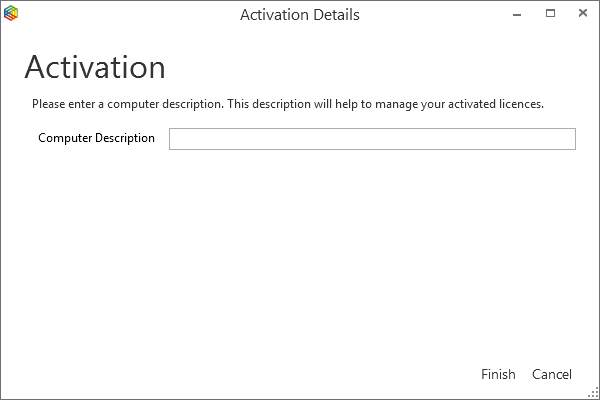
Figure 5-14: IonOS License Activation - Computer Description
Automatic
License activation is usually an automated process if there is an active internet connection. A dialog will be displayed while activation is performed and should only take a few seconds.

Figure 5-15: IonOS License Activation - Attempting Activation Dialog
Manual
If automatic activation has failed, you will be prompted with the following message.
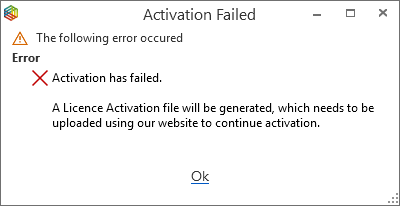
Figure 5-16: IonOS License Activation - Activation Failed Dialog
IonOS will then prompt you to save a License Activation File (*.lica).
The license will remain in an Activation required state until activation has been completed.
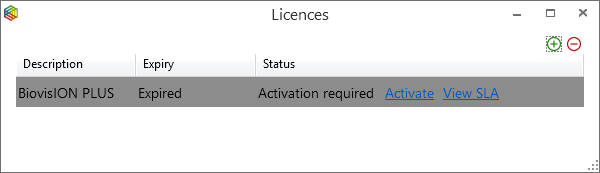
Figure 5-17: Licenses Activation Status
You must then gain access to an internet connected device and submit the exported License Activation File (*.lica) using the IonOS License Activation page within My IonOS on our website http://support.isoprime.co.uk.
Once submitted the website will then prompt you to download an activated license file (*.lic).
This newly downloaded license file can then be installed into IonOS by clicking the Add button. There is no need to remove the original Activation required license file as it will automatically be replaced with the newly installed activated license file.